Walk through a visit in the Visit Wizard
Open the Visit Wizard from the Fleet Calendar or the Wound Cockpit, confirm the patient context, and work the 17 sections end-to-end. This guide covers the full happy path plus the wizard's core behaviors: continuous autosave, the top-of-wizard data-pull toolbar, clinical history carry-forward, the LCD ambient badge, warn-and-proceed validation, DoseSpot e-prescribing, unified Procedures & Supplies, AI-assisted drafting, and Sign & Lock.
Before you start
- Your appointment is on the Fleet Calendar, or you opened the wound from the Wound Cockpit.
- Your device has location services enabled (required for the GPS geofence on in-person visits).
- For follow-up visits, review the Wound Cockpit "Where this wound is at" panel so you know what carries forward — see Wound Cockpit.
1. Open the wizard
From the Fleet Calendar
- Navigate to Fleet Calendar. Click Fleet Calendar in the sidebar. The calendar opens in Day view by default, with swim lanes per provider.
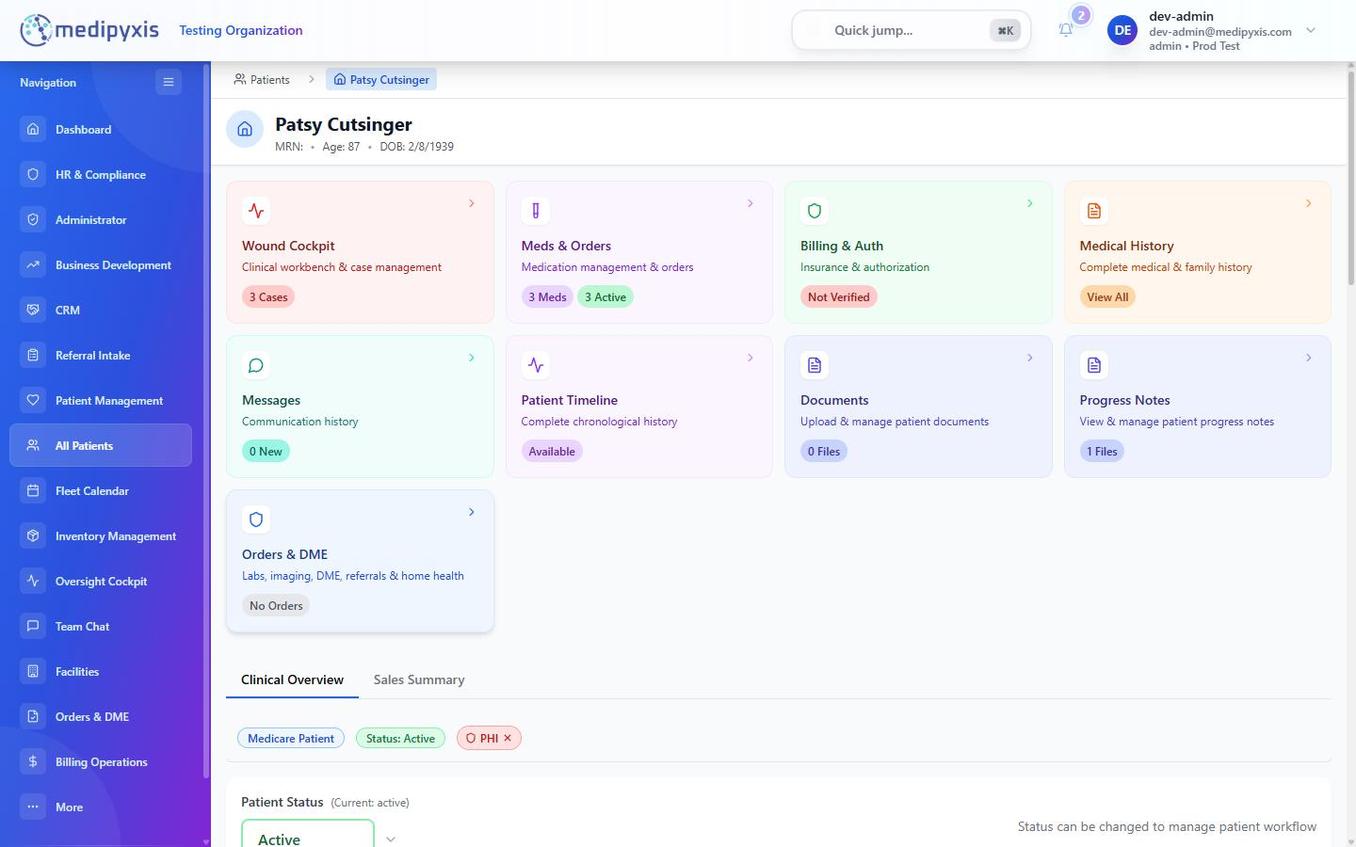
The patient header card on the Fleet Calendar appointment tile.
-
Tap the appointment tile. A detail popover appears with the patient name, appointment type, date, and time.
-
Click Start Visit. Specialty routing sends wound-care patients to the Wound Cockpit and primary-care patients to the Primary Care Cockpit.
From the Wound Cockpit
- From the patient chart, open the Wound Cockpit for the wound you intend to treat.
- Click Start Visit (or Continue Visit if a draft exists). The Visit Wizard opens to section 1 — or to the last section you worked if you are resuming a draft.
The Visit Timer starts automatically and appears in the top toolbar, alongside the LCD ambient badge.
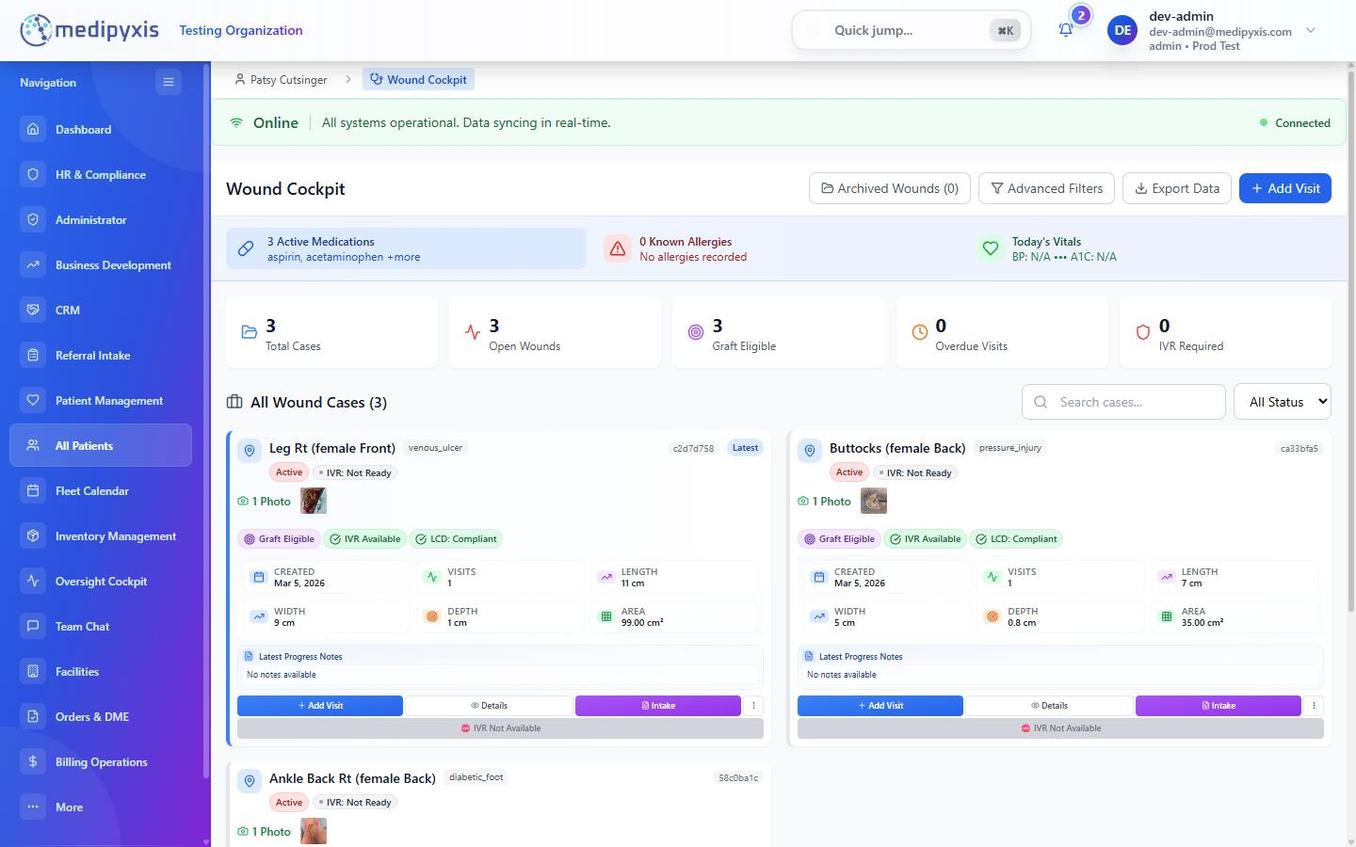
The Wound Cockpit panel — pre-visit snapshot of the active wound.
2. Pull in prior data (top-of-wizard toolbar)
The toolbar at the top of the wizard lets you bring documented data forward before you start typing. For a transferred patient, a migration context banner also appears.
| Action | What it does |
|---|---|
| Pull from History | Brings forward documented sections from the patient's prior visit (Review of Systems, Comorbidities, Allergies, Previous Treatment, historic measurements, care plan). A preview shows what will be applied before you confirm. |
| Smart Import | Pulls structured clinical data the system has already extracted for this patient and maps it into the matching wizard fields. |
| Pull Migration Data | For patients migrated from a prior EMR, pulls the imported chart data (visit history, wounds) into the visit. |
3. Section 1 — Consent & Attestation
- Present the HIPAA notice to the patient. The full HIPAA privacy notice is displayed on screen.
- Toggle Telehealth Consent if the visit is being conducted via telehealth.
- Collect patient e-signature. Hand the device to the patient or use the signature pad. Click Confirm Signature.
- Click Next.
4. Section 2 — Patient Context / Demographics
- Select the Visit Type. Choose
Initial,Follow-up,Post-op, orRe-eval. - Enter the Reason for Visit. Type a brief clinical summary (for example, "Evaluation and treatment of right heel diabetic foot ulcer").
- Review the Allergies card. Allergies pre-populate from prior visits and sync with DoseSpot. Add or update if anything changed since the last visit.
- Review insurance. Coverage is shown here for reference. The secondary payer is read-only — edit insurance on the Insurance tab, not in the wizard.
- Click Next.
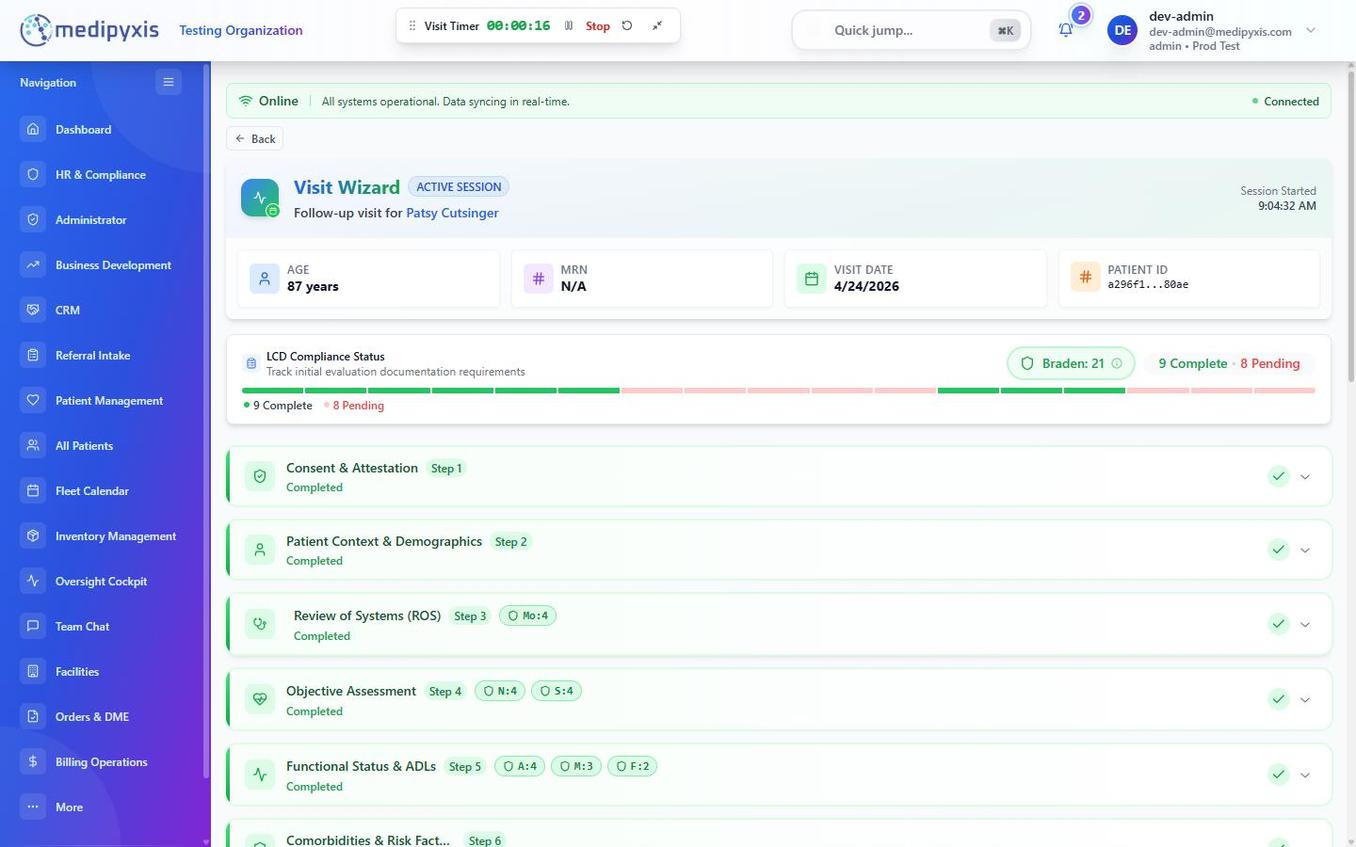
Section navigator. The active section is highlighted; completed sections show a checkmark.
5. Sections 3–6 — Clinical baseline
| Section | What to enter |
|---|---|
| 3. Review of Systems | Body-system checklist. Pre-populated from the prior visit; review each system and update as needed. |
| 4. Objective Assessment | Vitals: BP, HR, Temp, SpO₂, Respirations, Weight, Height, BMI. |
| 5. Comorbidities / Risk Factors | DM, PAD, CVI, CHF, lymphedema, smoking status. These feed the billing engine and the stage-aware ICD-10 resolver. |
| 6. Functional Status & ADLs | Ambulation, ADL independence, fall risk. |
Each section saves as you complete it. The LCD ambient badge refreshes on every save.
6. Section 7 — Wound Assessment
- Confirm wound etiology and staging. Stage drives the ICD-10 selection downstream.
- Set the wound's Treating / Monitoring status. A wound marked Monitoring carries a yellow pill and relaxes some required fields for that visit; flip it back to Treating at any time.
- Measure today. Enter Length (cm), Width (cm), and Depth (cm). Photo upload is required if your facility policy mandates it.
- Set tissue percentages by wound. Granulation / Slough / Necrotic / Epithelial / Eschar must sum to 100%.
- Confirm the precise anatomical location. The location field is editable — pick from the dropdown or type the specific area (for example,
Right lateral malleolus). - Document exudate, pain, and infection signs.
- Click Next.
See Wound Assessment for the full reference.
7. Section 8 — Previous Treatment
Document prior interventions so the plan and LCD checklist have the history they need.
- Add or update prior treatments — offloading, compression, debridement history, prior grafts.
- ABI for compression. If you intend to order compression, document the most recent ankle-brachial index. If compression is documented without an ABI on file, the wizard raises a soft warning and records a review flag — it no longer hard-blocks you from proceeding.
- Click Next.
8. Section 9 — Treatment / Intervention
- Select debridement type if performed:
sharp,mechanical,enzymatic, orautolytic. - Choose dressing(s) from the catalog. Record ultrasonic therapy (MIST / Arobella) if used.
- AI-assisted draft. Click AI draft to generate a narrative from the structured data you just entered. Edit the text — anything left in the draft becomes part of your signed note.
- Click Next.
9. Section 10 — Care Plan
- Enter goals, visit frequency, and the next-visit interval.
- Set plan-of-care dates — these satisfy LCD checklist item Plan-of-care dates.
- Click Next.
10. Section 11 — Procedures & Supplies
This is the single source of truth for procedures and supplies.
- Add procedures from the structured list.
- Scan UINs or enter graft SKUs and quantities. Wastage is calculated automatically and shown on the line item.
- Click Generate Procedure Note for a one-click procedure narrative; review and edit.
- Confirm the per-intervention surface — every item here flows into the billing codes engine.
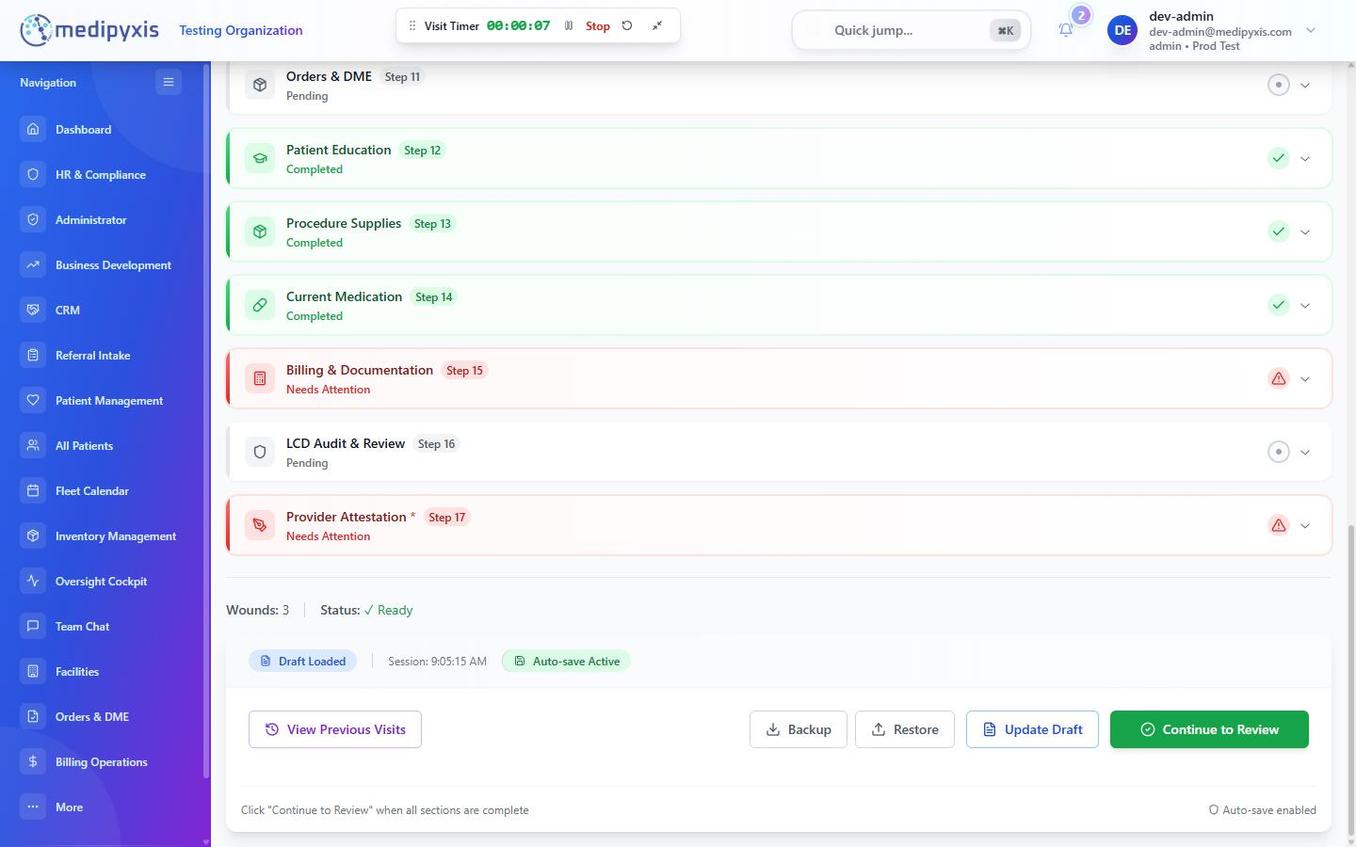
The lower portion of the section navigator.
- Click Next.
On save, a tissue log entry is written and inventory is deducted automatically.
11. Section 12 — Orders & DME
- Add clinical orders and DME. DME is a vendor-fulfilled order — there is no product picker here; you order the item and it is fulfilled downstream.
- Click Next.
12. Section 13 — Medication Management
- Manage the patient's medications and prescribe through DoseSpot. Pharmacy selection and the prescription itself are handled in the DoseSpot modal.
- Click Next.
13. Section 14 — Billing
- Review the Medical Necessity Statement. It is auto-generated from the clinical sections. Edit anything that doesn't match what you did.
- Review the CPT autocode output. The deterministic engine runs first; if it returns zero rows, the AI fallback engages and the BillingLine provenance shows
AIfor the relevant lines. Pull Codes can auto-populate codes from your documentation. - Verify E/M level, modifiers (
25,59,KX,JW,JZ), and POS code. Billing lines can be dragged to reorder. - Read the BillingLine provenance panel. Each line shows
DeterministicorAI. Spot-check AI-sourced lines before continuing. - Click Next.
AI line is supported by your documentation before attestation.
14. Section 15 — Patient Education
- Select patient education handouts.
- Toggle Teach-back documented (
Y/N). - Click Next.
15. Section 16 — LCD Audit & Review
- The LCD ambient badge should be green at this point. If amber or red items remain, the Navigator shows links back to the section where the missing data must be entered. See LCD Navigator.
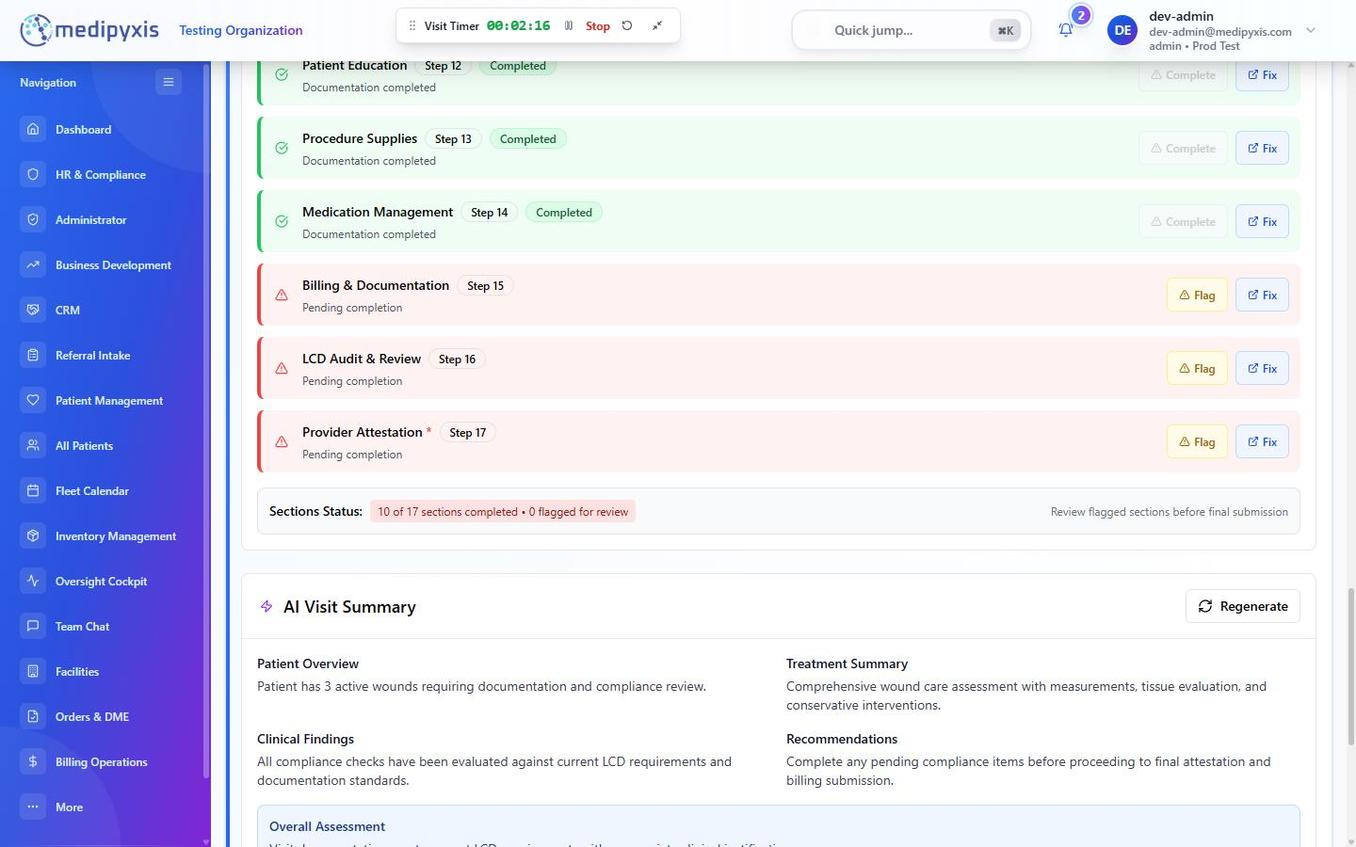
Section 16 opens the LCD Navigator final review. Items requiring action are highlighted in amber.
- Resolve any remaining amber items by jumping to the linked section, fixing the data, and returning.
- Click Next to move to Provider Attestation.
16. Section 17 — Provider Attestation
- Read the attestation sentence covering the ESIGN Act, UETA, CMS, and HIPAA disclosure standards.
- Sign on the signature pad.
- Click Sign & Lock. If the service date does not match the appointment date, a soft-block prompt asks for a reason before locking.
Once locked, a Go to Billing prompt appears. The note is now locked and any later change requires an Addendum with a documented reason. PDF generation runs in the background — see Sign Off for what to do if PDF fails.
Saving and resuming
- Continuous autosave — each field is saved as you complete it (per-field debounced save plus a safety-net heartbeat), so drafts survive network drops and device switches. The web wizard is online-only; there is no separate offline mode.
- Resume by tapping the same appointment tile on the Fleet Calendar (or opening the Wound Cockpit and clicking Continue Visit). You land back where you left off, on any device.
Result
You completed all 17 sections, the LCD ambient badge is green, the Medical Necessity Statement and billing codes are reviewed, and the rendering provider has attested with Sign & Lock. The encounter is locked, the PDF is generated, the tissue log and inventory are updated, and a Go to Billing prompt hands the encounter off to the Billing Work Queue.
Troubleshooting
| Symptom | Likely cause | What to do |
|---|---|---|
| Start Visit button is grayed out | Appointment is in Canceled or No Show status |
Update the appointment status before starting. |
| Visit Timer shows "GPS unavailable" | Location services are disabled on the device | Enable location permissions for the browser or the Medipyxis app in device settings. |
| Wizard opens but shows the wrong patient | Tapped the wrong appointment tile | Close the wizard, then reopen from the correct tile. |
| Compression order shows a warning in section 8 | No ABI value on file | Enter the ABI in section 8 (Previous Treatment) or order one — the warning does not block you, but resolve it before Sign & Lock. |
| LCD ambient badge stays amber after a save | One or more checklist items still need data | Click the badge to open the Navigator; follow the jump-back link to the offending section. |
BillingLine shows AI for unexpected lines |
Deterministic engine returned zero rows for that scenario | Verify the line is supported by your documentation; correct in section 11 or 14. |
| PDF generation fails after Sign & Lock | Transient downstream error | The system retries automatically; if still failing, the Sentry event ID is shown — share it with support. See Sign Off. |
Related
Auto-rendered from related: in frontmatter.